Capture Markup:边截边标,无需等待
Capture Markup:边截边标
你是否曾经截了一张图,等待标注编辑器打开,寻找正确的工具,然后终于开始画指向 Bug 的箭头?
这个工作流如此熟悉,以至于我们大多数人都接受它"就是这么工作的"。但其实不必如此。
有了 Capture Markup —— Snapzy v1.14 中的新功能 —— 你可以直接在截图遮罩中标注。没有新窗口。没有中断。截图、绘制、完成。
那个反复出现的问题
想想你传统的截图工作流:
- 你按下快捷键截图
- 一个缩略图弹出在角落
- 你点击缩略图(或打开应用)
- 标注编辑器在新窗口中打开
- 你找到工具,选择颜色,画箭头
- 保存或复制
每个循环大约需要 15-20 秒。听起来不多,但如果你一天截 30 张图,那就是将近 10 分钟花在等待窗口打开上。
更重要的是:每次上下文切换都迫使你的大脑重新加载专注状态。你正深陷调试流程,发现一个 Bug,截了图 —— 然后被拉进一个不同的窗口。等你回来,Bug 已经滚动消失,或者你忘了接下来要做什么。
什么是 Capture Markup?
Capture Markup(也称为内联区域标注)让你在截图选择屏幕区域时,直接在遮罩中添加标注。
不再是:
截图 → 打开编辑器 → 标注 → 保存
而是变成:
截图 + 内联标注 → 保存

在截图遮罩中,拖动选择后,一个工具栏会出现在选中区域正上方。你可以:
- 画箭头指向重要的细节
- 添加文字做快速说明
- 画矩形或圆形圈出 UI 元素
- 高亮代码块或按钮
- 添加编号步骤用于教程
- 使用画笔做手绘标记
- 撤销 / 重做如果你搞错了
所有这些都发生在你已经注视的屏幕上。没有新窗口。没有过渡动画。没有丢失专注。
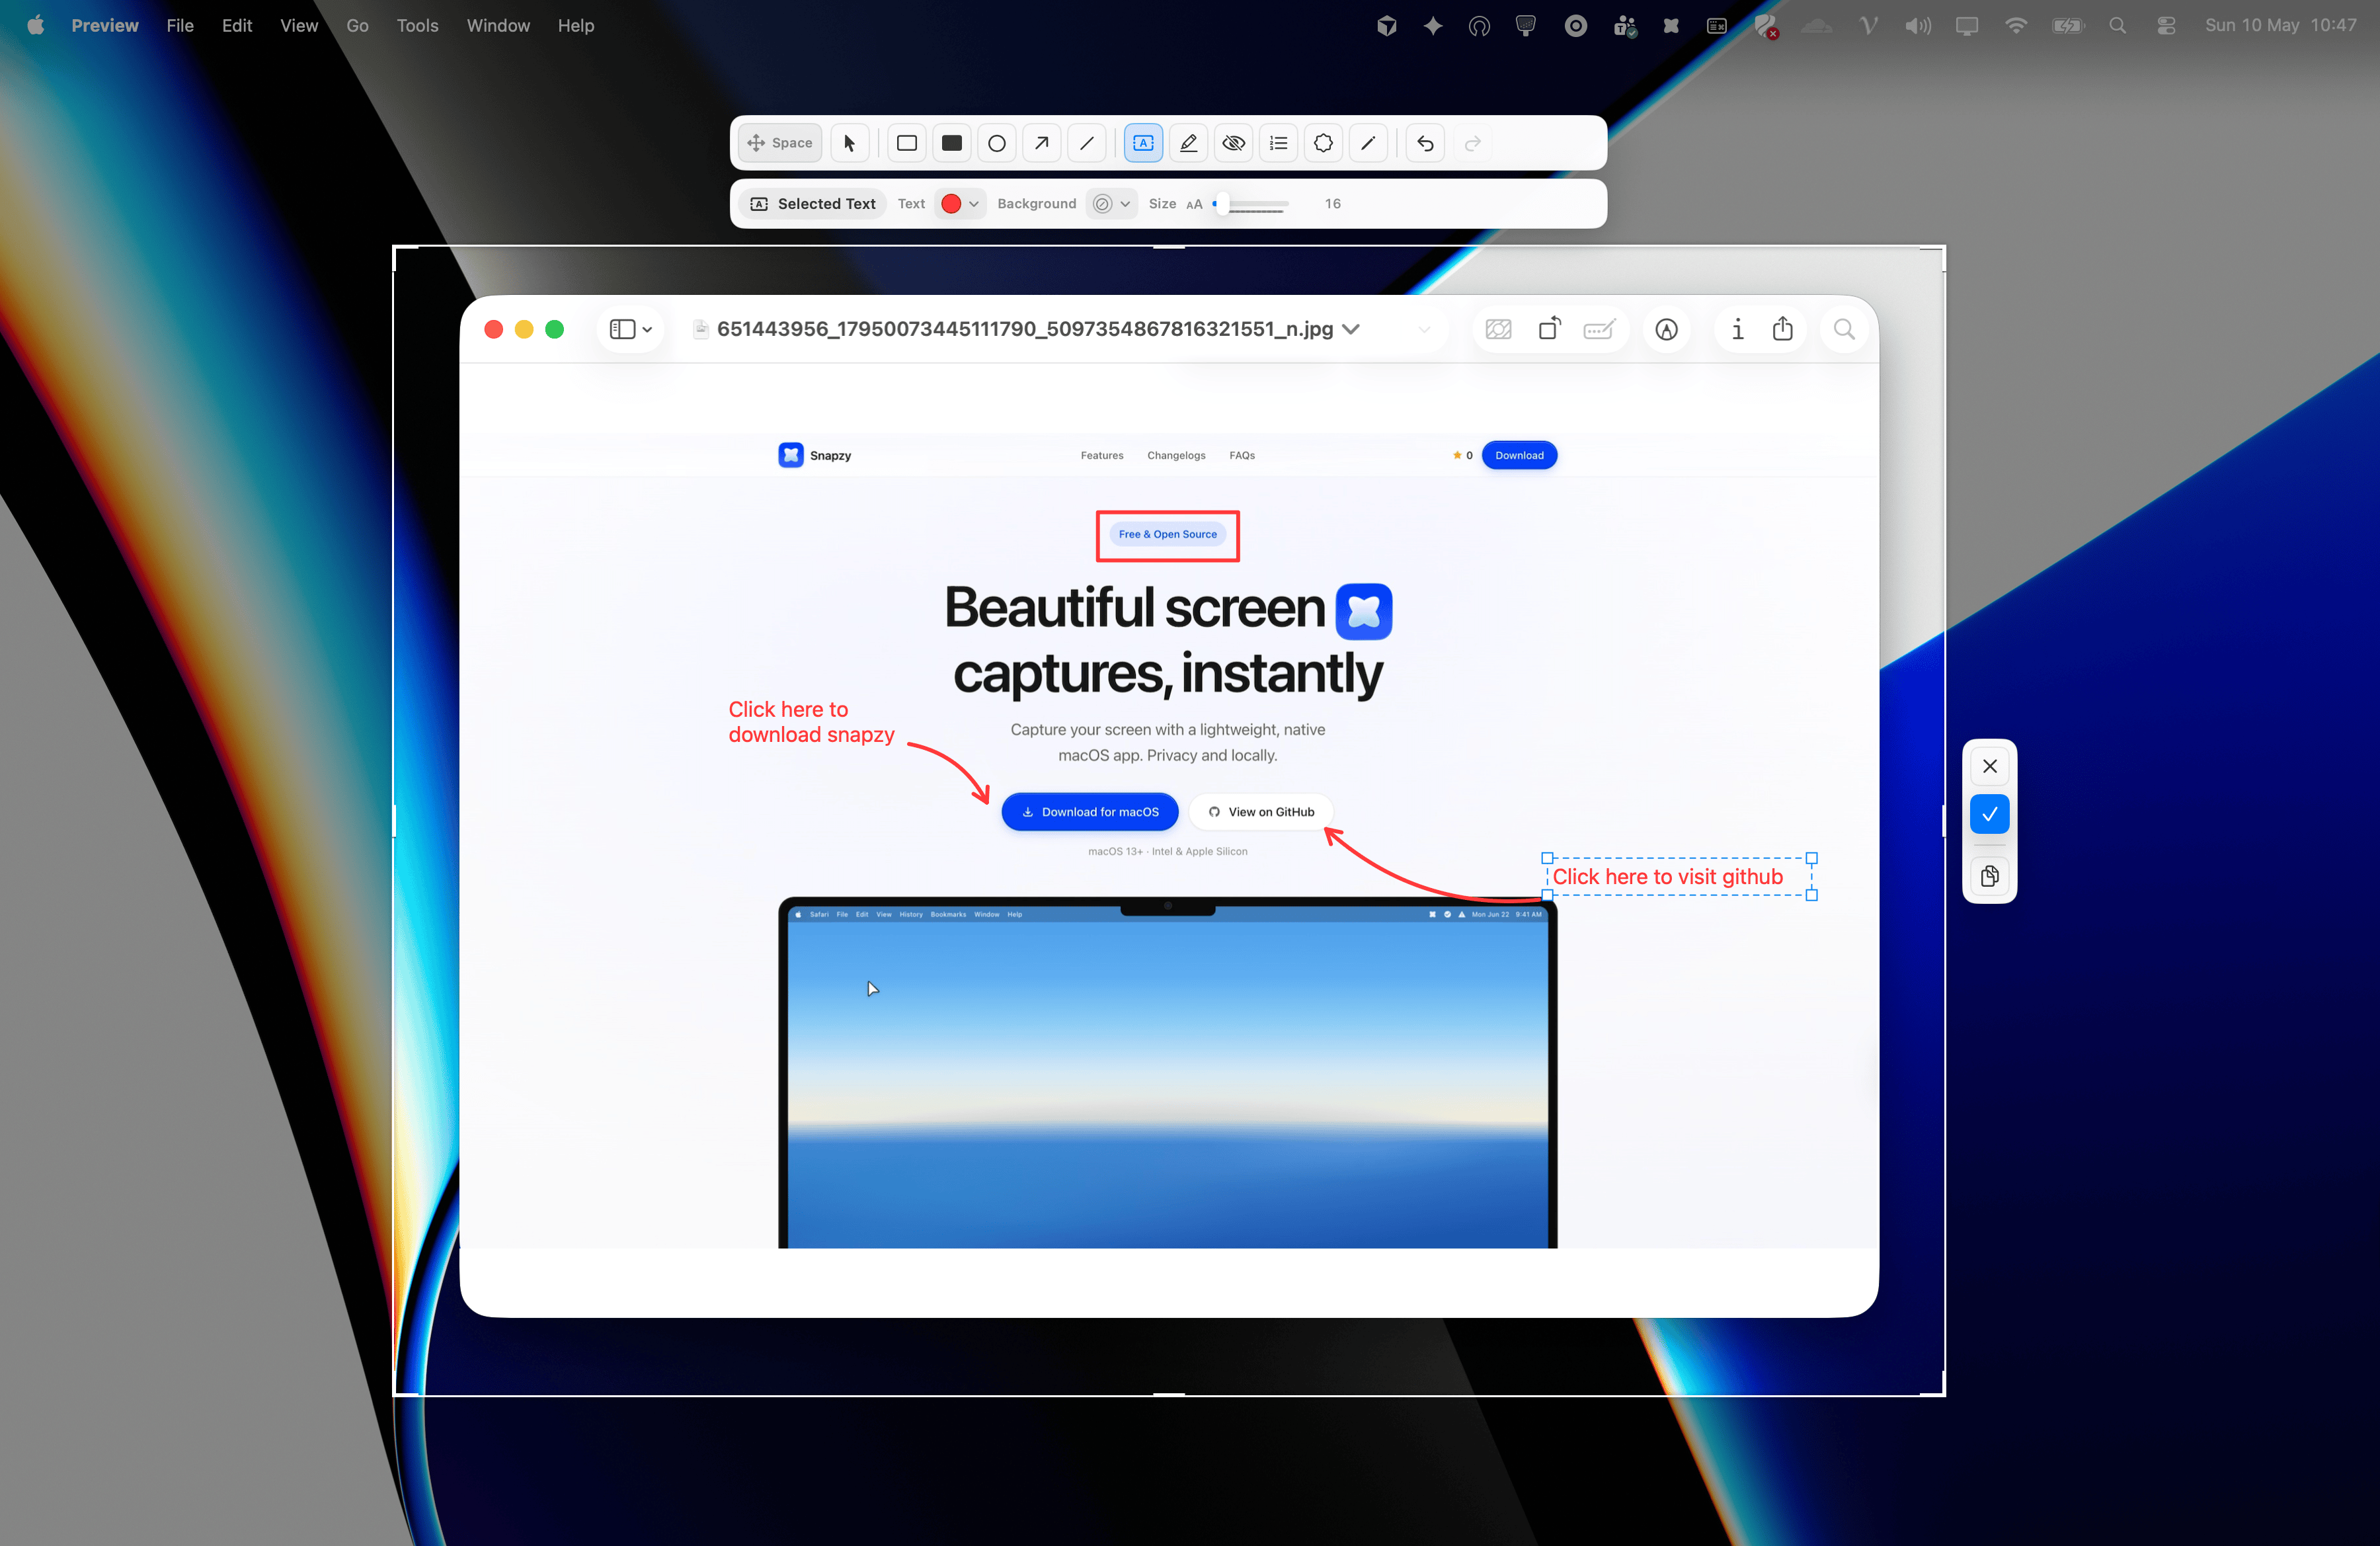
实际界面是什么样的
以下是 Capture Markup 在截取网页区域时的真实界面:
注意:
- 工具工具栏位于选区正上方,紧凑而不突兀
- 属性栏显示当前工具的选项 —— 颜色、大小、背景
- 箭头和文字标注实时直接绘制在截图上
- 完成后,按 Enter 或点击勾选按钮 —— 图片保存时所有标注已内嵌
与其他应用的对比
| 功能 | Snapzy (Capture Markup) | CleanShot X | Shottr | macOS 原生 |
|---|---|---|---|---|
| 在截图遮罩内标注 | 支持 | 不支持 | 不支持 | 不支持 |
| 从截图到完成的时间 | ~5 秒 | ~15 秒 | ~12 秒 | ~20 秒 |
| 工作流步骤 | 2 步 | 4 步 | 4 步 | 5+ 步 |
| 保持工作上下文 | 支持 | 不支持 | 不支持 | 不支持 |
| 遮罩中撤销/重做 | 支持 | 不支持 | 不支持 | 不支持 |
| 遮罩中的完整标注工具箱 | 支持 | 仅基础预览 | 不支持 | 不支持 |
CleanShot X
CleanShot X 在截图后有一个快速访问遮罩,但它主要用于预览、复制或选择操作(保存、标注、上传)。要真正标注,你仍然需要打开单独的标注编辑器。他们的遮罩看起来很棒,但它是"截图后控制面板" —— 不是"边截边画的画布"。
Shottr
Shottr 有 solid 的标注工具,但它们完全是截图后的。你先截图,然后图片在编辑器窗口中打开。截图期间完全没有内联遮罩。
macOS 原生
内置的 macOS 截图工具通过 Preview 工具栏提供基础标注(如果你打开保存的图片),但流程很笨拙:截图 → 在桌面上找到文件 → 打开 Preview → 选择工具。没有遮罩,没有内联功能。
何时使用 Capture Markup,何时使用标注编辑器
Capture Markup 不会取代完整的标注编辑器 —— 它们互为补充。
使用 Capture Markup 当:
- 你需要快速发一张带几个箭头或短注释的截图
- 你正在调试,需要立即标记 Bug
- 你在写内部文档,需要简单的分步说明
- 你想保持工作流专注,不中断上下文
使用标注编辑器当:
- 你需要重度编辑:精确裁剪、背景替换、水印
- 你要导出特定的画布尺寸用于社交媒体
- 你想应用保存的预设
- 你在编辑之前截的图
Snapzy 两者都给你。Capture Markup 求速度。标注编辑器求深度。
如何开启
Capture Markup 内置于 区域截图(⌘⇧3),从 Snapzy v1.14.0 开始可用。
使用方法:
- 按 ⌘⇧3 打开冻结区域截图
- 拖动选择你想要的区域
- 标注工具栏会自动出现在你的选区上方
- 选择工具并直接在遮罩上绘制
- 按 Enter 或点击勾选按钮保存
- 图片复制到剪贴板(或保存到文件,取决于你的设置)
如果你不想在特定截图中使用 Capture Markup,只需忽略工具栏 —— 选择区域后直接按 Enter,截图会正常保存。
总结
Capture Markup 改变了你对截图的思考方式。不再是"先截后修" —— 而是"截和修一气呵成"。
用其他应用,截图和标注之间总有间隙。用 Snapzy,这个间隙消失了。
如果你还没更新到 v1.14,打开 Snapzy 检查更新。这个功能是免费的,就像 Snapzy 中的所有其他功能一样。